
Are your kitchen cabinets looking tired or outdated? Restaining them can breathe new life into your space without the cost of a full replacement.
But how do you restain kitchen cabinets the right way to get that flawless, fresh finish? Whether you want to go darker for a richer look or lighter for a brighter kitchen, this guide will walk you through every step.
You’ll learn simple tips to prepare your cabinets, choose the perfect stain, and seal your work for lasting beauty. Stick with me, and by the end, you’ll feel confident transforming your cabinets into the centerpiece of your kitchen. Ready to get started? Let’s dive in!
Preparing Cabinets
Start by cleaning all cabinet surfaces thoroughly. Use a mild detergent and warm water to remove dirt, grease, and dust. This step ensures the stain will stick properly. Let the cabinets dry completely before moving on.
Next, sand the cabinets using fine-grit sandpaper (around 120-150 grit). Sanding removes the old finish and roughens the surface for better stain absorption. Always sand in the direction of the wood grain. After sanding, wipe off the dust with a damp cloth.
Remove all old hardware such as knobs, handles, and hinges. This makes staining easier and prevents damage to the hardware. Store the hardware safely for reinstallation after staining.
Choosing The Right Stain
Gel stain is thick and easy to apply on cabinets. It spreads evenly and hides blotches well. This makes it a good choice for uneven wood surfaces. Gel stains dry slower, giving more time to work. They also create a rich, uniform color that lasts long.
Oil-based stains soak deep into wood and give a warm, rich look. They take longer to dry and may have a strong smell. Water-based stains dry fast and have less odor. They clean up easily with soap and water. Both types protect wood well but choose based on your comfort and project needs.
| Color Tip | Advice |
|---|---|
| Test First | Try stain on a small wood piece to check the color. |
| Match Style | Pick colors that match your kitchen’s design and lighting. |
| Go Darker | Darker stains hide damage better and add depth. |
| Natural Look | Light stains show wood grain clearly and brighten rooms. |
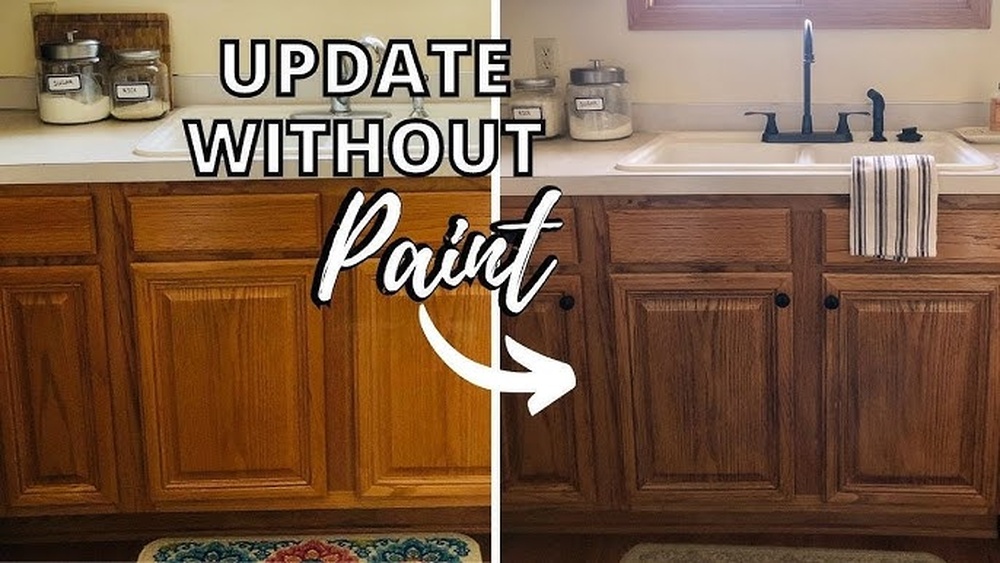
Restaining Darker
Start with light sanding to create a smooth surface. This helps the new stain stick better. Use fine-grit sandpaper and sand evenly. Wipe off dust with a damp cloth before staining.
Choose a gel stain for a rich, even color. Apply the gel stain with a brush or cloth, following the wood grain. Let it sit for a few minutes, then wipe off the excess with a clean cloth.
Apply multiple coats to get a deeper, darker color. Wait for each coat to dry fully before adding the next. Usually, two to three coats work best. Sand lightly between coats if needed for smoothness.
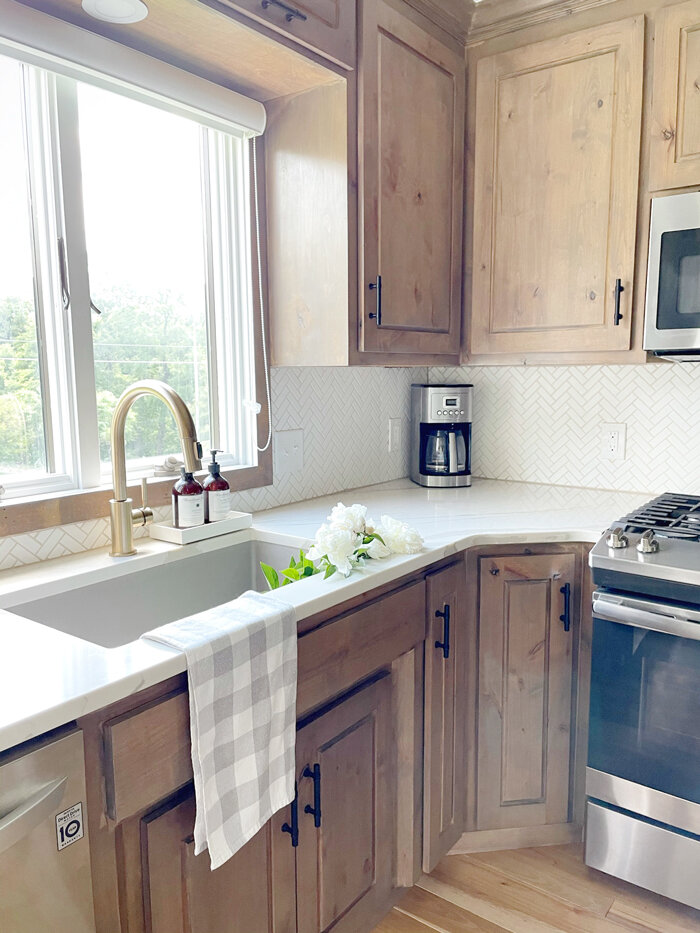
Restaining Lighter
Start by removing the old finish using a chemical stripper. Apply the stripper evenly and let it sit for the time recommended on the label. Use a scraper to gently lift off the softened finish. This step is crucial for a smooth restain.
Next comes the heavy sanding process. Sand all surfaces with medium-grit sandpaper to remove any remaining finish and smooth the wood. Follow with fine-grit sandpaper for a clean, even surface. Sanding helps the new stain soak in properly.
Prepare the bare wood by wiping it down with a damp cloth. This removes dust and sanding residue. Allow the wood to dry completely before applying any stain. Proper prep ensures the stain will look even and natural.
Sealing And Protection
Choosing the right top coat is key to protect your cabinets. Polyurethane offers strong protection and durability. Water-based finishes dry faster and have less odor. Oil-based finishes give a warm glow but take longer to dry.
Applying a clear finish requires thin, even coats. Use a good brush or a lint-free cloth. Avoid thick layers to prevent drips and bubbles. Lightly sand between coats for smoothness.
Drying and curing times vary by product. Water-based finishes dry in 1-2 hours, while oil-based can take 6-8 hours. Full curing can take up to 7 days. Avoid heavy use until fully cured to prevent damage.

Common Mistakes To Avoid
Skipping prep work can ruin the entire project. Proper cleaning and sanding make the stain stick well. Without it, the finish may peel or look patchy.
Using incorrect stain causes poor color and finish problems. Choose a stain that matches your cabinet wood type. Some stains do not work on certain woods or finishes.
Rushing the drying process leads to sticky or uneven surfaces. Allow enough time for the stain to dry fully. Follow the product instructions for best results.
Tools And Materials Needed
Essential supplies include sandpaper, wood stain, brushes, and clean cloths. Choose medium and fine-grit sandpaper for prepping the wood surface. Use stain brushes or foam applicators to apply the stain evenly. Have lint-free cloths ready for wiping off excess stain.
Recommended brands often trusted for kitchen cabinet projects are Minwax, Varathane, and General Finishes. These brands provide good color options and durable finishes. Pick a brand that fits your budget and matches the wood type.
Safety gear is important to protect yourself. Wear gloves to avoid skin contact with stains and chemicals. Use a dust mask when sanding to prevent breathing in dust. Work in a well-ventilated area to avoid inhaling fumes from stains and finishes.
Maintenance Tips Post-restain
Clean cabinets gently with a soft cloth and mild soap. Avoid harsh chemicals that can damage the stain. Wipe spills quickly to prevent stains from setting in. Use a damp cloth to remove dust regularly. Dry cabinets thoroughly to avoid water damage.
Handle wear and tear by fixing scratches with a matching stain marker. Small chips can be touched up using wood filler before restaining. Use cabinet liners inside drawers to reduce damage. Avoid slamming doors to keep finishes intact.
Refinish cabinets again when the stain looks dull or scratched. Check areas exposed to water or heat for fading. Refinishing every few years keeps cabinets looking fresh. Light sanding before refinishing helps new stain stick better.
Frequently Asked Questions
Can You Restain Cabinets That Are Already Stained?
Yes, you can restain already stained cabinets. For darker colors, clean and lightly sand first, then apply a darker stain. To lighten, fully strip the old finish by sanding or using a chemical stripper before applying new stain. Always seal with a clear topcoat for protection.
Can I Restain My Cabinets Without Sanding?
Yes, you can restain cabinets without sanding if applying a gel stain over a clean, grease-free surface. Light sanding helps new stain adhere better. For darker colors, gel stains work well on existing finishes. To lighten cabinets, you must fully strip and sand the old stain first.
What Is The Best Way To Restain Kitchen Cabinets?
The best way to restain kitchen cabinets starts with cleaning and lightly sanding them. Apply a gel stain for darker colors. For lighter colors, strip old finishes completely before staining. Finish by sealing with a clear topcoat to protect and enhance durability.
How To Stain Over Already Stained Cabinets?
Clean and lightly sand cabinets to remove grease and create adhesion. Apply a darker gel stain for better coverage. Seal with a clear topcoat. For lighter stain, fully strip old finish, sand bare wood, then restain and seal.
Conclusion
Restaining kitchen cabinets can refresh your space without full replacement. Clean and sand well for best results. Choose the right stain for the color you want. Apply evenly and seal to protect your work. Take your time and follow each step carefully.
Enjoy a fresh, updated kitchen look that feels new. Small effort, big change. Your cabinets will thank you.

Yes, working as , Food Blogger and Product Reviewer for last 6 years. Here you will get amazing deals for Smart kitchen products. I am your best source for the latest update in cooking trends. I provide insightful articles, reviews, and analysis on cutting-edge kitchen gadget. My mission is to empower readers with the knowledge they need to stay ahead in a rapidly evolving coking world. Join me as we explore the future of food technology and how it shapes our lives today and tomorrow.