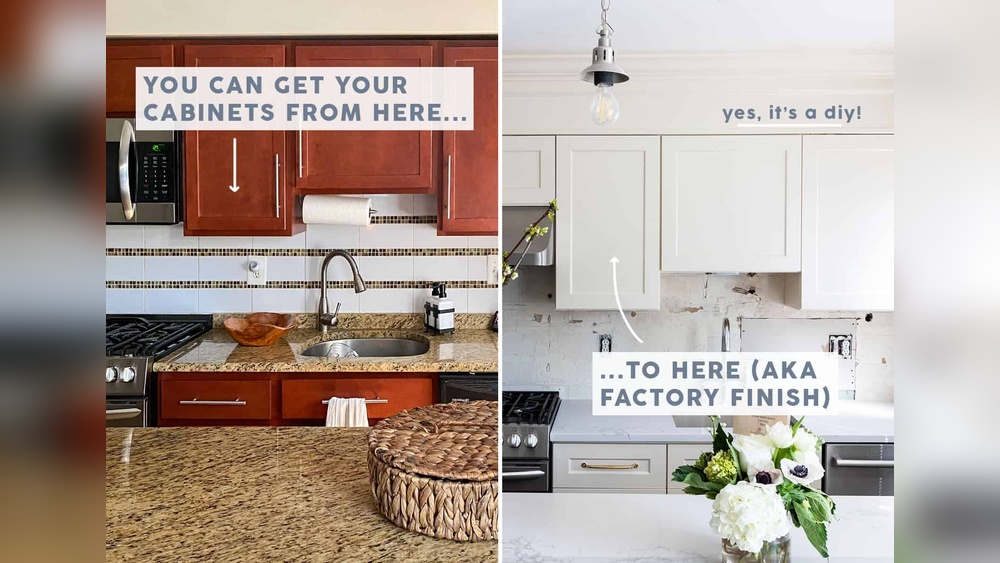
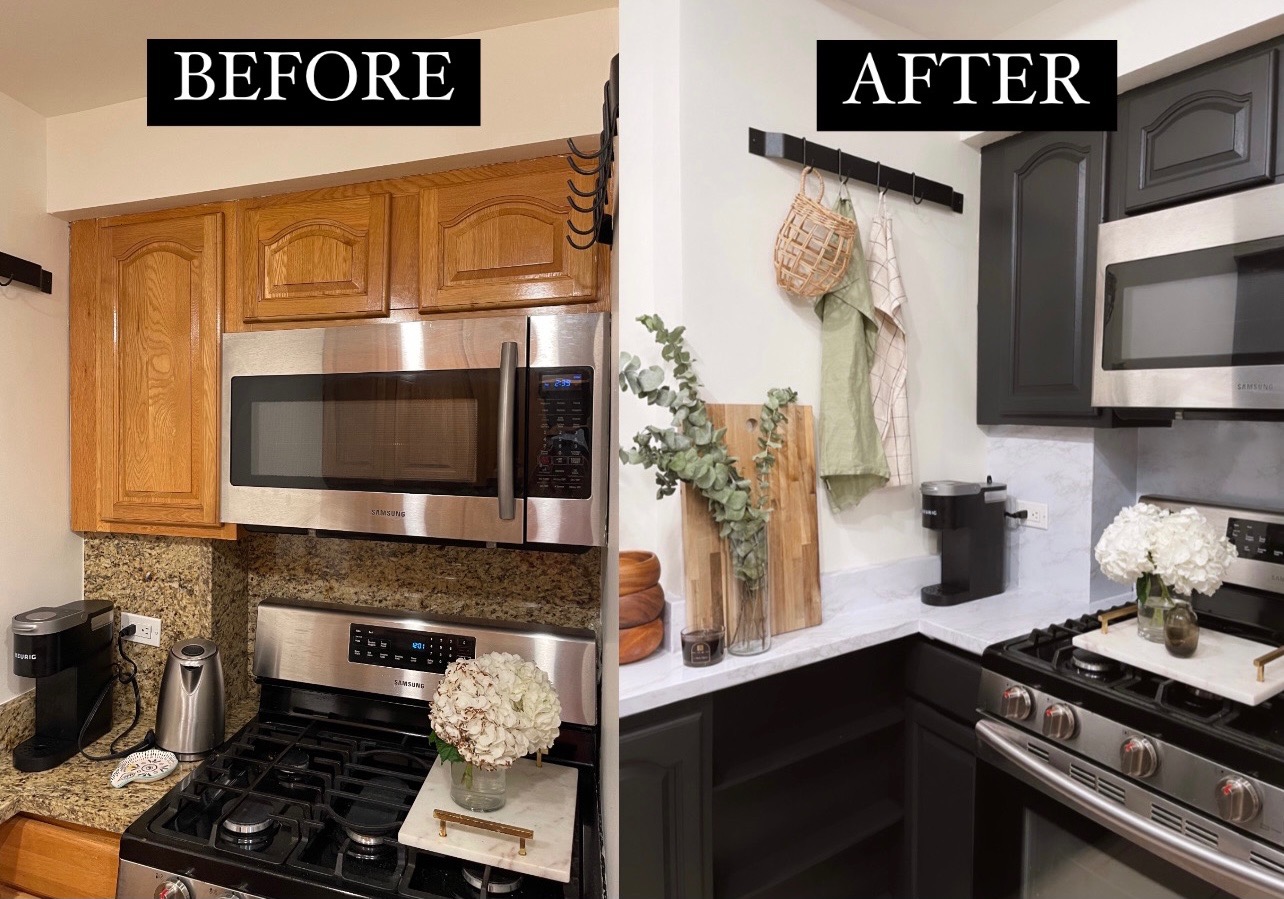
Are your kitchen cabinets looking tired and outdated? Repainting them can completely transform your kitchen’s look without the cost of a full remodel.
But if you’ve never tackled this before, the process might seem overwhelming. Don’t worry—you can achieve a fresh, professional finish with the right steps and a little patience. In this guide, you’ll learn exactly how to repaint your kitchen cabinets the smart way, from prepping the surfaces to choosing the best paint.
Stick with me, and you’ll soon have cabinets that look brand new and make your kitchen a space you love to spend time in. Ready to get started? Let’s dive in!
Planning Your Makeover
Choosing the right paint and primer is key for a successful cabinet makeover. Use a high-quality primer to help paint stick well and last longer. For kitchen cabinets, semi-gloss or satin paint works best because it is easy to clean and resists stains.
Selecting tools and supplies carefully saves time and gives better results. Essential tools include paintbrushes, rollers, sandpaper, and painter’s tape. A good brush with synthetic bristles works well for smooth finishes. Use fine-grit sandpaper to prep surfaces gently.
| Cabinet Material | Recommended Primer | Notes |
|---|---|---|
| Wood | Oil-based or latex primer | Sand well for smooth surface |
| MDF | Shellac or oil-based primer | Seal edges to prevent swelling |
| Laminate | Bonding primer | Test primer on a small area first |
Prepping Cabinets For Paint
Start by cleaning off all grease and dirt from the cabinet surfaces. Use a mild degreaser or soapy water and a sponge to wipe down every area. This step is essential because grease stops paint from sticking well.
Next, sand the cabinets lightly with fine-grit sandpaper. Sanding creates a rough surface that helps the paint grip better. Focus on areas with a glossy finish and avoid sanding too hard to prevent damage.
Check for any damages like cracks or holes in the wood. Use wood filler to fill in holes and smooth out cracks. Let the filler dry completely, then sand it smooth. This makes the surface even and ready for paint.
Priming Cabinets
Choosing the right primer is essential for a smooth paint job on kitchen cabinets. Use a high-quality bonding primer especially for cabinets with glossy or laminate surfaces. These primers help paint stick better and last longer.
Laminate cabinets need special primers designed to bond with slick surfaces. Test the primer on a small hidden area first to ensure good adhesion and no damage.
Allow the primer to dry completely before painting. Drying time depends on temperature and humidity. Aim for a warm, dry room with good air circulation to speed up the process. Avoid touching the surface until fully dry.
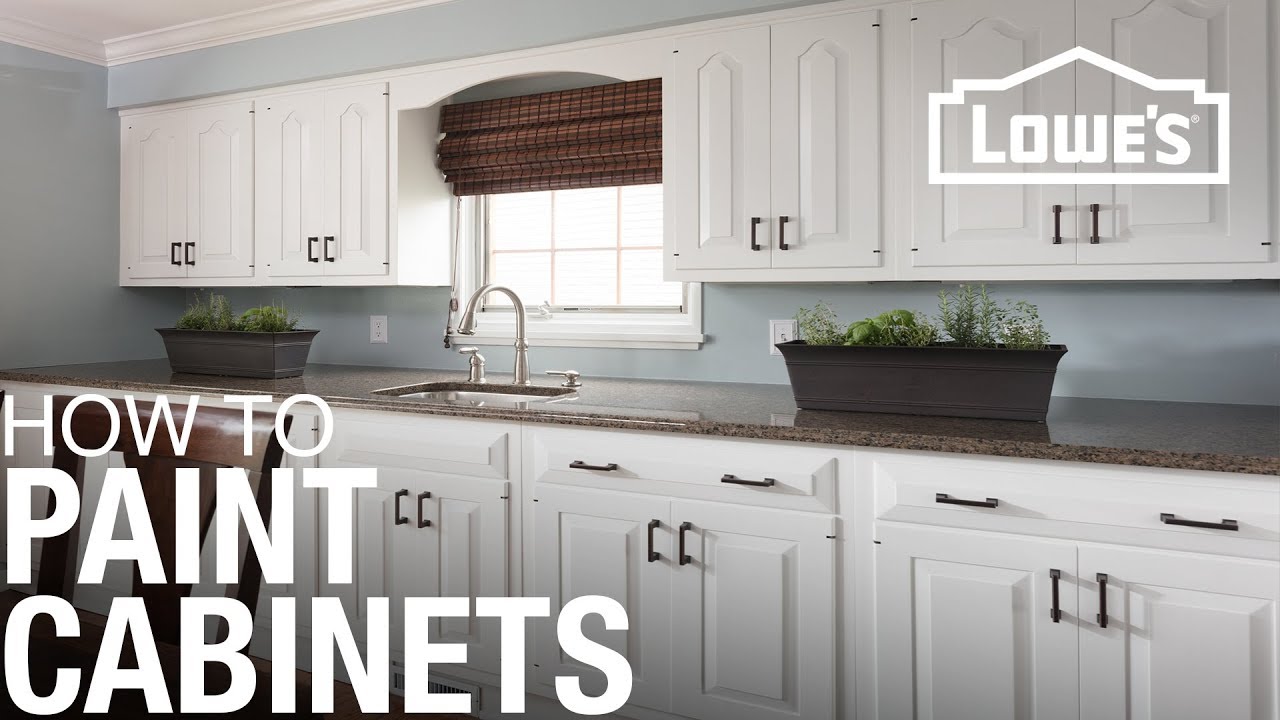
Painting Techniques
Choosing the right paint finish is key for kitchen cabinets. Satin or semi-gloss finishes work best. They clean easily and resist stains. Matte finishes can look nice but are harder to clean.
Apply the first coat with a smooth, even stroke. Use a high-quality brush or roller. Start at the edges and work towards the center. Thin coats dry faster and reduce drips.
Wait until the first coat is dry before adding more. Usually, 2 to 3 coats are needed for full coverage. Each coat should be thin and even. This helps the paint look smooth and last longer.
- Use long, light strokes to avoid brush marks.
- Keep a wet edge to prevent lap marks.
- Check for drips and smooth them out immediately.
- Don’t overload your brush with paint.
Finishing Touches
Let the paint cure fully before touching or reattaching anything. This may take 24 to 48 hours depending on paint type and room conditions. Patience ensures a smooth, durable finish without smudges or dents.
Use a screwdriver to carefully reattach hardware like handles and knobs. Check if any screws need tightening or replacing. Avoid forcing pieces back to prevent damage to the fresh paint.
- Clean cabinets gently with a soft cloth and mild soap.
- Avoid harsh chemicals that could wear paint.
- Wipe spills immediately to prevent stains.
- Regular dusting keeps surfaces looking fresh.
- Use gentle cleaners to maintain the finish.
Common Challenges
Stubborn surfaces often resist paint. Light sanding is key to help paint stick better. Use a fine-grit sandpaper to avoid damage. Clean dust off before painting.
Paint bubbles appear when air or moisture gets trapped. To fix bubbles, remove loose paint and sand smooth. Apply a primer to prevent peeling later. Paint in thin, even coats.
Uneven coverage makes cabinets look patchy. Use a quality brush or roller and paint in thin layers. Allow each coat to dry fully before applying the next one. Patience leads to a smooth finish.
Cost And Time Estimates
Budgeting for materials usually includes paint, primer, brushes, rollers, and sandpaper. Expect to spend between $50 to $150 depending on cabinet size and paint quality. Choosing durable, easy-to-clean paint is important for kitchen use. Primer helps paint stick better and lasts longer, so it’s worth including in the budget. Don’t forget supplies like painter’s tape and drop cloths to protect surfaces.
Project timeline overview often spans 3 to 7 days. Day 1 involves cleaning and sanding the cabinets thoroughly. Day 2 is for priming all surfaces. Days 3 and 4 are for applying 2-3 coats of paint, allowing drying time between coats. Additional time may be needed for doors and hardware to dry separately. Patience is key for a smooth, lasting finish.
Safety And Environmental Tips
Proper ventilation is essential while painting kitchen cabinets. Open windows and doors to let fresh air in. Use fans to push fumes outside. This helps reduce harmful fumes that paint releases.
Wear protective gear such as gloves, masks, and safety glasses. Gloves protect your skin from chemicals. Masks prevent you from inhaling paint dust and fumes. Safety glasses guard your eyes from splashes.
Choose eco-friendly paint options to protect your health and the environment. Look for paints labeled low-VOC or no-VOC. These paints have fewer harmful chemicals and less smell. Water-based paints are a good choice for cabinets.
| Paint Type | Benefits |
|---|---|
| Low-VOC Paint | Less harmful fumes, safer indoors |
| No-VOC Paint | Minimal chemicals, very low smell |
| Water-Based Paint | Easy to clean, eco-friendly |

Frequently Asked Questions
Can I Just Paint Over My Kitchen Cabinets?
Yes, you can paint over kitchen cabinets. Clean, sand, and prime the surface first for proper paint adhesion and durability.
Can I Just Paint Over Already Painted Cabinets?
Yes, you can paint over painted cabinets. Clean, sand lightly, and apply a quality primer first for better paint adhesion and durability.
Can I Repaint My Kitchen Cabinets Myself?
Yes, you can repaint kitchen cabinets yourself with proper preparation. Clean, sand, prime, and use durable paint for lasting results.
Can I Just Paint Over My Kitchen Cabinets Without Sanding?
You can paint over kitchen cabinets without sanding, but light sanding improves paint adhesion and durability. Clean cabinets thoroughly first. Use a quality primer before painting to ensure lasting results. Skipping sanding may cause peeling or uneven finish. Proper preparation guarantees a smooth, long-lasting cabinet makeover.
Conclusion
Repainting kitchen cabinets can refresh your entire kitchen look. Clean and sand surfaces well for better paint grip. Use a good primer to ensure paint sticks and lasts. Apply paint evenly and allow drying time between coats. Choose durable paint finishes for easy cleaning and long life.
Taking these simple steps makes your cabinets look like new. Enjoy your fresh, updated kitchen without spending much. A little effort brings big changes to your home’s heart.

Yes, working as , Food Blogger and Product Reviewer for last 6 years. Here you will get amazing deals for Smart kitchen products. I am your best source for the latest update in cooking trends. I provide insightful articles, reviews, and analysis on cutting-edge kitchen gadget. My mission is to empower readers with the knowledge they need to stay ahead in a rapidly evolving coking world. Join me as we explore the future of food technology and how it shapes our lives today and tomorrow.