Thinking about giving your kitchen a fresh new look? Removing your old kitchen cabinets is the first big step—and it doesn’t have to be a headache.
Whether you’re tackling this project on your own or just want to understand the process before calling in help, knowing how to remove kitchen cabinets safely and efficiently will save you time, money, and frustration. In this guide, you’ll discover simple, clear steps to take down your cabinets without damaging your walls or the cabinets themselves.
Ready to roll up your sleeves and get started? Let’s dive in and make your kitchen transformation easier than you ever imagined.

Tools And Materials Needed
Gather these essential tools and materials for removing kitchen cabinets. A screwdriver or drill with a screwdriver bit helps remove screws holding cabinets to walls. Use a putty knife or utility knife to cut through caulking or paint sealing the cabinets.
A crowbar or pry bar helps gently pry cabinets from the wall without damage. Have work gloves to protect your hands from sharp edges and splinters. Safety glasses guard your eyes from dust and debris.
Keep a step stool or ladder nearby to reach upper cabinets safely. Use a bucket or trash bag for screws and small parts. A stud finder locates wall studs holding cabinets securely.
| Tool/Material | Purpose |
|---|---|
| Screwdriver/Drill | Remove screws |
| Putty Knife/Utility Knife | Cut caulking/paint |
| Crowbar/Pry Bar | Pry cabinets from wall |
| Work Gloves | Protect hands |
| Safety Glasses | Protect eyes |
| Step Stool/Ladder | Reach upper cabinets |
| Bucket/Trash Bag | Hold screws and parts |
| Stud Finder | Locate wall studs |
Preparing The Kitchen
Clear all items from the kitchen area. Remove dishes, utensils, and small appliances. This gives enough space to work safely and avoid damage. Cover the floor and countertops with protective sheets or old blankets. This protects surfaces from dust and scratches.
Turn off the electricity and water supply in the kitchen. This prevents accidents while removing cabinets near outlets or plumbing. Use a tester to check if power is off.
Cover sharp edges or corners with tape to avoid cuts. Keep a flashlight nearby for better visibility in dark spots. Organize tools and keep them within reach for smooth work.
Removing Cabinet Doors And Drawers
Unscrewing hinges is the first step to remove cabinet doors. Use a screwdriver to take out the screws holding the hinges to the door. Keep the screws safe to reuse later. Gently pull the door away from the cabinet frame once screws are removed. This avoids damage to both door and frame.
Taking out drawers safely means removing any stops or clips inside the cabinet. Pull the drawer out slowly until you feel resistance. Press or lift the clips to release the drawer from the track. Slide the drawer out fully without forcing it. This prevents breaking the drawer or track.
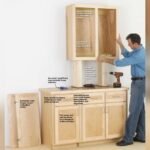
Detaching Cabinets From Walls
Start by locating the wall studs behind the cabinets. Use a stud finder or tap the wall to find solid spots. Cabinets are usually attached to these studs with screws or nails.
Next, remove all screws and nails holding the cabinet in place. Use a drill or screwdriver for screws. A pry bar can help with nails. Work slowly to avoid wall damage.
Some cabinets are also glued to the wall. Carefully slide a putty knife or thin pry tool between the cabinet and wall to break the glue. Take your time to prevent damage.
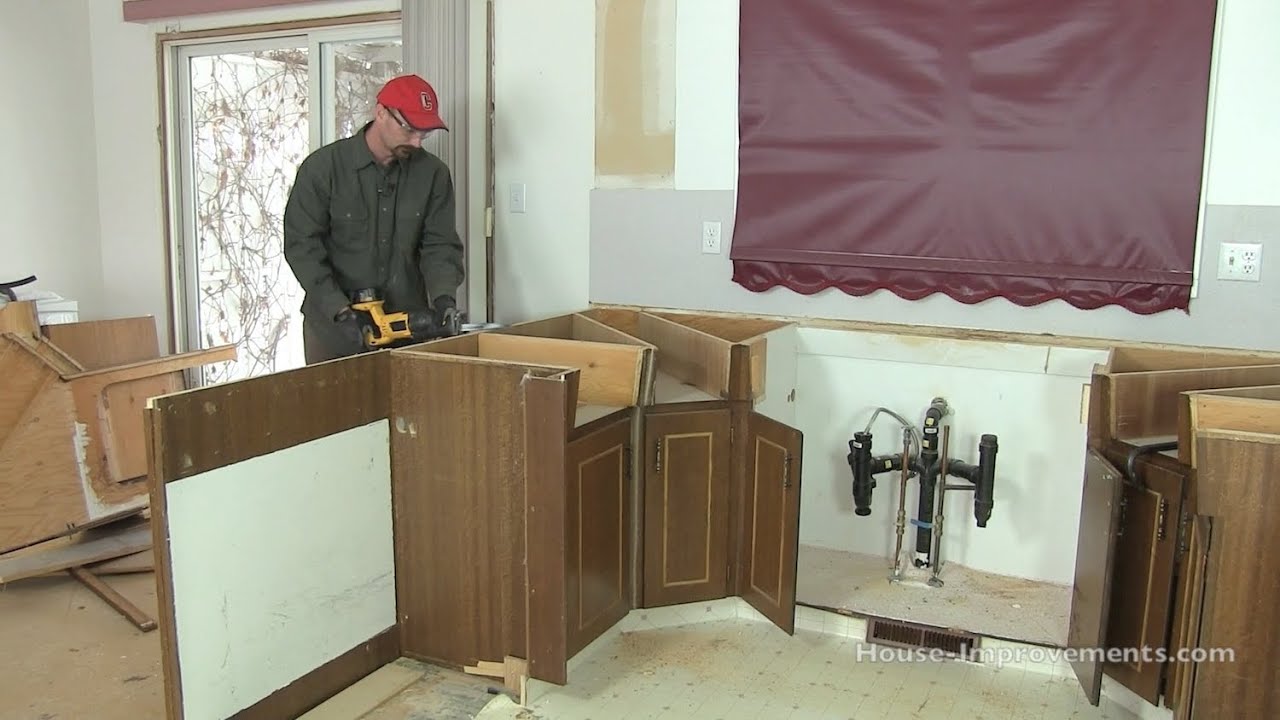
Removing Base Cabinets
Before removing base cabinets, check for plumbing and electrical connections. Turn off water supply and power at the main switch. Look behind and inside cabinets for pipes, wires, or outlets. This prevents damage and accidents.
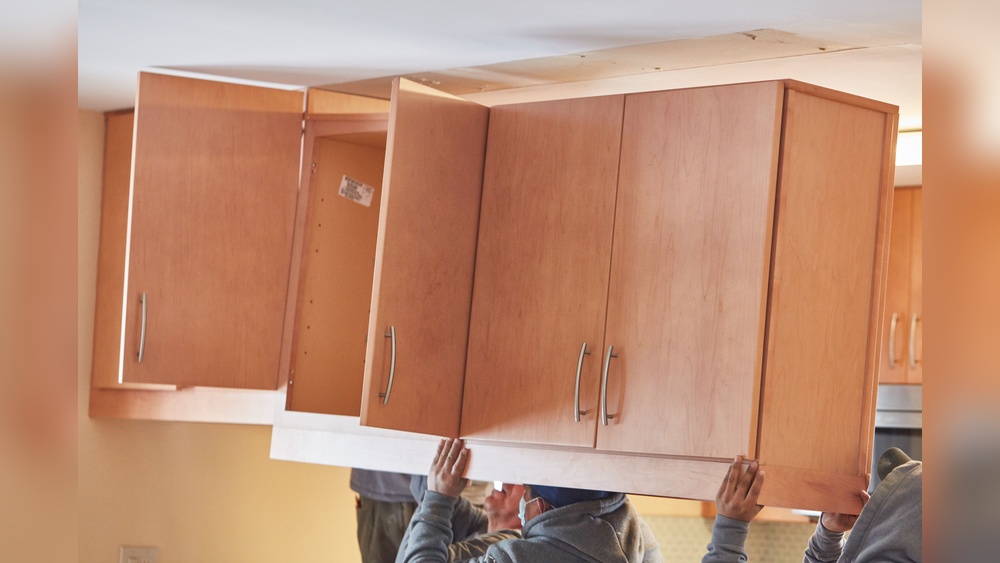
To lift cabinets carefully, start by removing all screws holding them to the wall. Use a helper if cabinets are heavy or large. Pull cabinets gently away from the wall. Avoid sudden moves to protect walls and floors.
Keep cabinets level when lifting to stop them from tipping. Place them on a soft surface to avoid scratches. Handle with care to keep cabinets reusable or in good condition for disposal.
Dealing With Wall Damage
Small holes left after cabinet removal need filling with putty or spackle. Let the filler dry completely before moving on. Use a putty knife to spread the compound evenly and fill all gaps.
Once the filler is dry, sand the area smooth using fine-grit sandpaper. Sand until the patched area is flush with the wall surface. This helps the wall look even and ready for painting.
Dust off the wall after sanding. Use a clean cloth or vacuum to remove all dust particles. A smooth, clean surface makes painting easier and looks better.
Disposal And Cleanup
Sorting materials is key for easy disposal. Separate wood, metal, and plastic parts carefully. This helps in recycling and waste management.
Wood pieces can be reused or taken to a wood recycling center. Metal parts like screws and brackets should go to a metal recycler.
| Material | Disposal Option |
|---|---|
| Wood | Reuse, donate, or recycle at wood center |
| Metal | Recycle at scrap metal yard |
| Plastic | Sort for local plastic recycling |
| Broken parts | Dispose at local waste facility |
Safe disposal keeps the area clean and avoids hazards. Use gloves and masks to protect yourself during cleanup.
Tips For A Smooth Remodel
Working with a partner makes cabinet removal safer and easier. One person can hold the cabinet steady while the other removes screws or nails. This teamwork helps prevent damage to walls and cabinets.
Keeping hardware organized saves time and frustration later. Use small containers or bags for screws, nails, and hinges. Label each container to know exactly where each piece belongs.
Planning ahead includes gathering all tools before starting. Have a drill, screwdriver, pry bar, and safety gear ready. Measure cabinets and check for hidden fasteners. Clear the area to move removed cabinets without obstacles.
:max_bytes(150000):strip_icc()/how-to-remove-kitchen-cabinets-8304279-hero-30b6ec50f04347ea8ef6dd85178cab25.jpg)
Frequently Asked Questions
Can I Remove Kitchen Cabinets Myself?
Yes, you can remove kitchen cabinets yourself if you have basic tools and strength. Support cabinets before unscrewing. Be cautious of glued cabinets, as removal may cause damage.
Are Kitchen Cabinets Glued To The Wall?
Kitchen cabinets usually attach to walls with screws or nails into studs. Sometimes, glue adds extra hold, especially in custom or unitized cabinets. Glue can make removal harder and risk damage. Most standard cabinets rely on mechanical fasteners, not glue, for secure installation.
How Do You Remove Cabinets Without Damaging Walls?
Use a pry bar gently to loosen cabinet edges. Remove screws securing cabinets to studs carefully. Support cabinets to avoid wall stress. Work slowly to prevent drywall damage. Fill holes and touch up walls after removal for a clean finish.
How Much To Remove Old Kitchen Cabinets?
Removing old kitchen cabinets typically costs between $150 and $500, depending on cabinet size and complexity. DIY removal saves labor costs but requires tools and effort. Professional removal ensures safety and wall protection but increases expenses. Expect higher prices if cabinets are glued or custom-built.
Conclusion
Removing kitchen cabinets takes patience and the right tools. Start by turning off power near your workspace. Support upper cabinets before unscrewing for safety. Carefully remove screws and nails holding cabinets to walls. Watch for glued spots, which may need gentle prying.
Take your time to avoid wall damage. Clean the area once cabinets are gone. This simple process helps prepare your kitchen for updates. With care, you can remove cabinets safely and efficiently. Ready for your next kitchen project?

Yes, working as , Food Blogger and Product Reviewer for last 6 years. Here you will get amazing deals for Smart kitchen products. I am your best source for the latest update in cooking trends. I provide insightful articles, reviews, and analysis on cutting-edge kitchen gadget. My mission is to empower readers with the knowledge they need to stay ahead in a rapidly evolving coking world. Join me as we explore the future of food technology and how it shapes our lives today and tomorrow.